
Instruction. How to make an email campaign in UniSender?
To start full-fledged email marketing, you need to register in the mailing service. These are applications in which you can send bulk emails, analyze their effectiveness, work with deliverability and subscriber unsubscribes. A regular mailbox is not designed for this.
I will tell you how to send an email in 4 steps using the UniSender mailing service as an example.
- Registration.
- Base loading.
- Creating a letter.
- Sending.
Step 1. Registration
Enter your email on the registration page. A confirmation email will be sent to it. You can also register using Facebook, Google, Mail.ru, VK, Yandex.

Create a password to enter your personal account. Confirm registration by email.
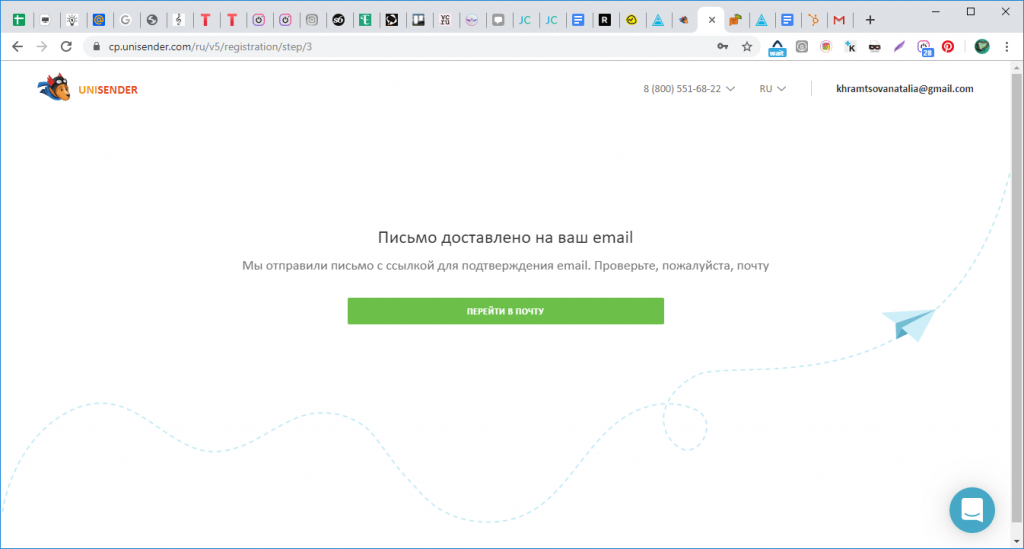
A confirmation email will be sent to the email you left on the registration page. Click on the “Go to mail” button to continue registration.
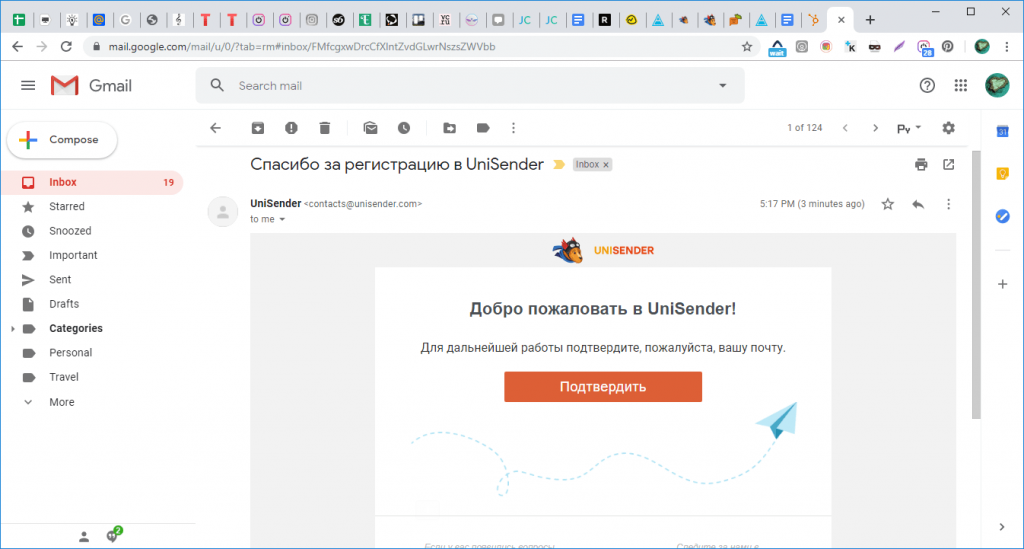
To activate your account, click on the “Confirm” button.
After activation, a form will open to fill in the data. Please provide a phone number so that Support can contact you promptly.
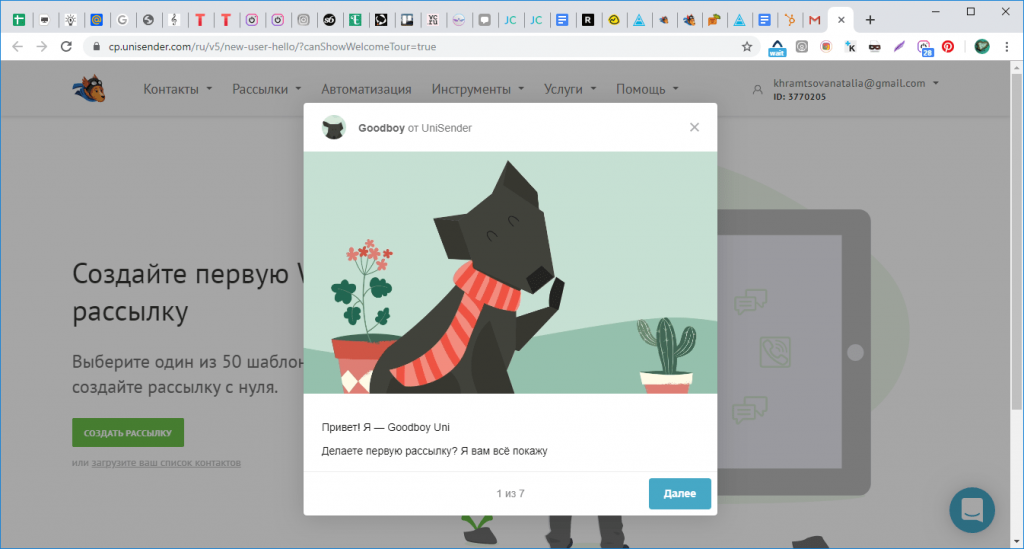
Registration is completed – you will be taken to the main page of the service. Here Goodboy Uni will come to your aid – the character of UniSender, which will show you all the tools of the service.
Step 2. Download the subscriber database
If there is no base. You need to collect it. The easiest way to do this is through the subscription form on the site.
The base cannot be bought or borrowed from open sources. Mailing to such addresses is spam. This is inefficient and illegal.
A trial mailing can be done without a contact database. If you don’t have email clients yet, just skip to the next step.
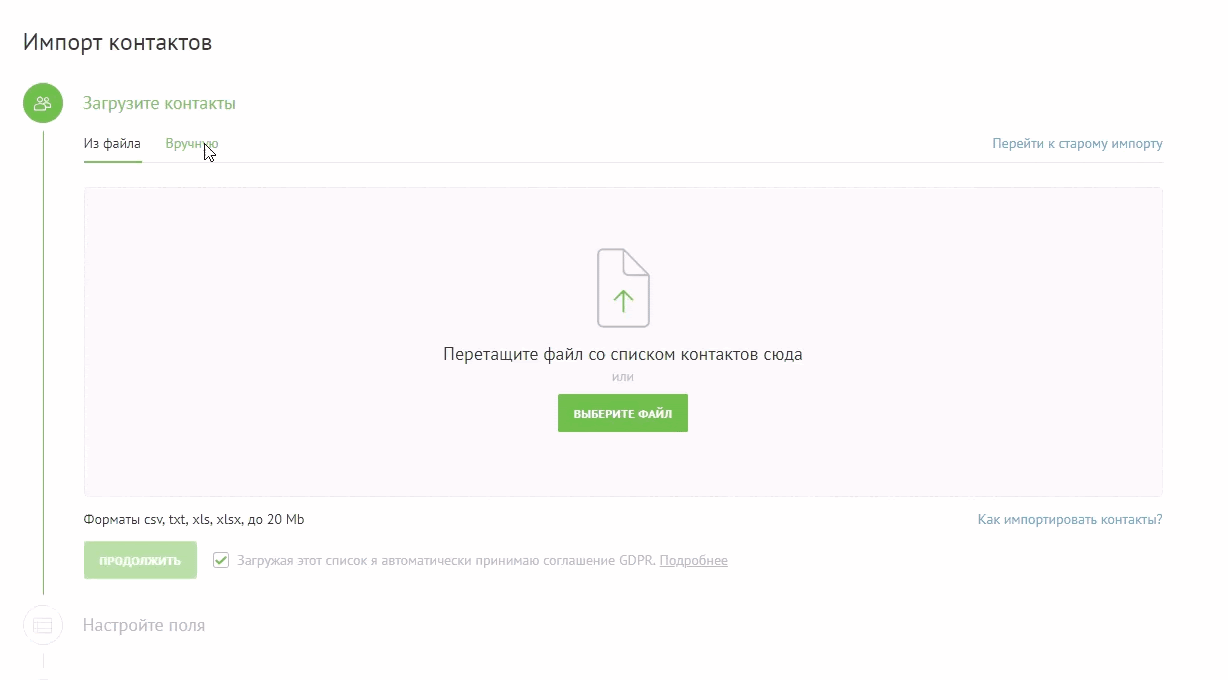
If there is a base. If you already have a database, upload a file with contact information or copy the information from it to UniSender. To do this, in the “Contacts” menu, select “List of contacts”, and then “Import contacts”.
Loading contacts from a file
On the “Import Contacts” page, select “From File” to load contacts. Drag or select a file to upload.
When everything is ready, click the “Continue” button.
Load contacts from text
- On the “Import Contacts” page, select “Manually” to download contacts.
- On the first line, add headings for each column that correspond to the same data type. Next, write down information about each contact on a new line.
- Between data about one contact, use one of the separators: comma, semicolon, or tab.
- You can upload a maximum of 50,000 contacts at a time.
Margin customization
Select one of the existing fields or create a new field (birthday, gender, company name, customer category). Additional fields are used for data substitution into the text and for segmentation of contacts.
If you do not want to add any of the fields, select “Do not import” or leave the value “Select a field”.
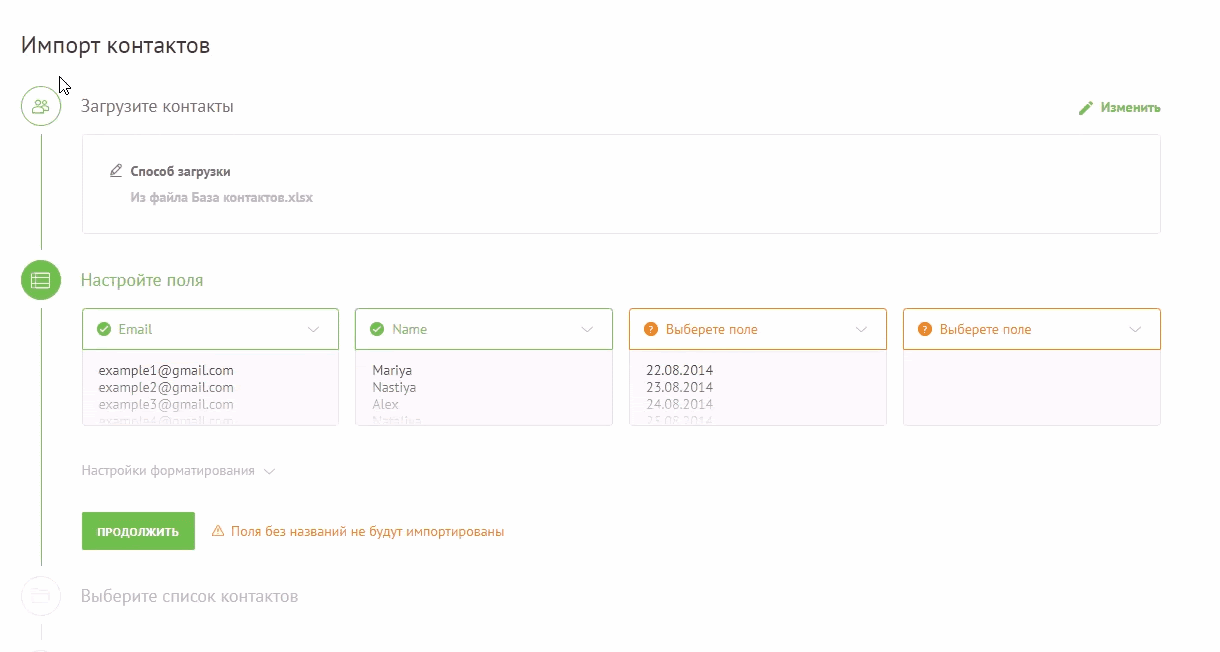
One of the fields should always be “Email” or “Mobile”.
Select contact list
When importing, you must select the list in which the contacts will be placed. Lists in a mailing list are like folders on a computer—we can put different contacts in different places.
To add contacts to the list, select one of the existing contacts from the drop-down menu or create a new one.
You can add labels to contacts that will be imported. For example, this way we can single out webinar participants or those who came from the form on the site into a separate segment. Labels will help segment the database in the future.
If you are going to send emails regularly, you need to create a corporate email and set up email authentication. But if you just want to test the service, you can skip this step.
- Corporate mail – an email address on your site’s domain from which letters will be sent. It is needed so that the mailing service can send a lot of messages that will get into the Inbox.
- Email authentication – several records in the DNS zone of the domain. If you add them, mail services will be more willing to pass our letters to the “Inbox” to users.
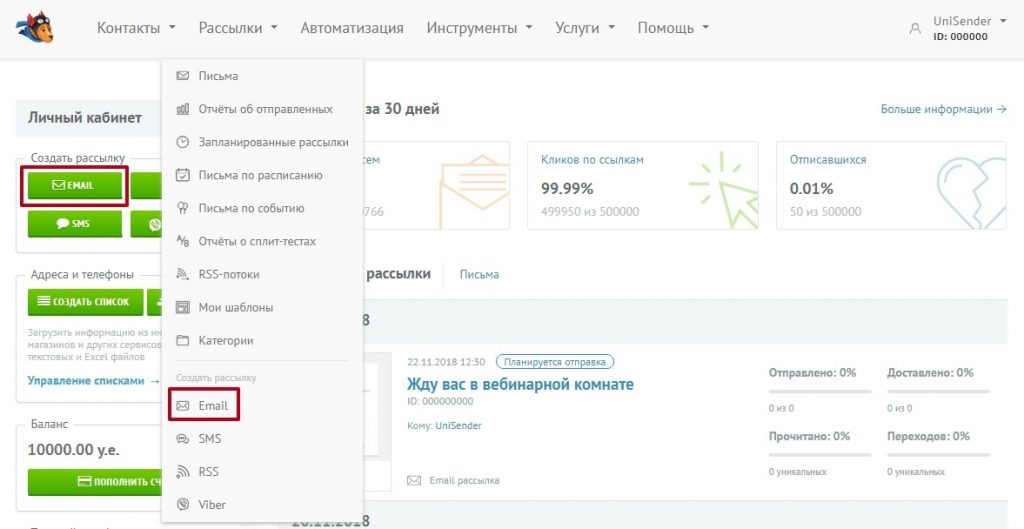
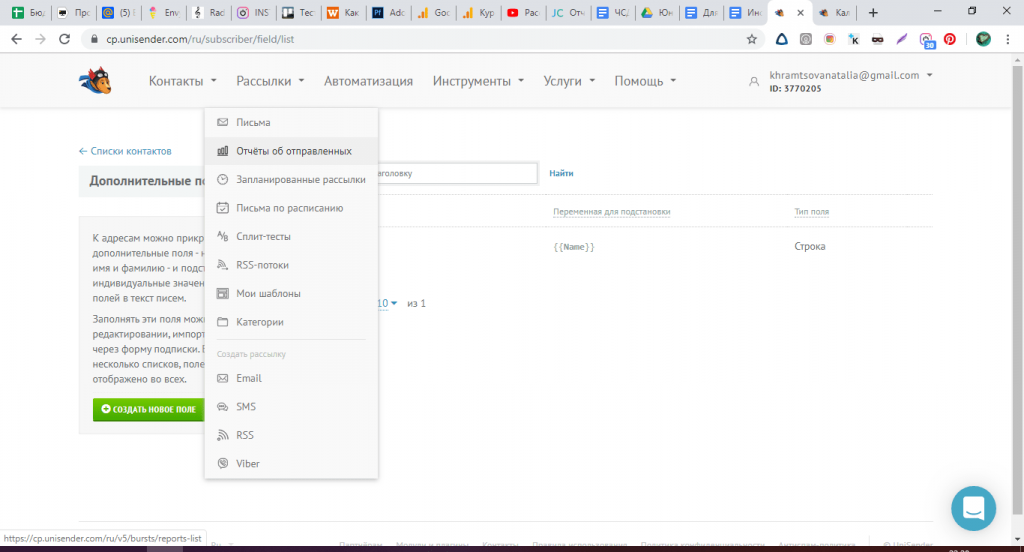
Step 3. Create your mailing list
To create the first mailing list, go to the menu “Mailing lists” → “Create mailing list” → “Email”.
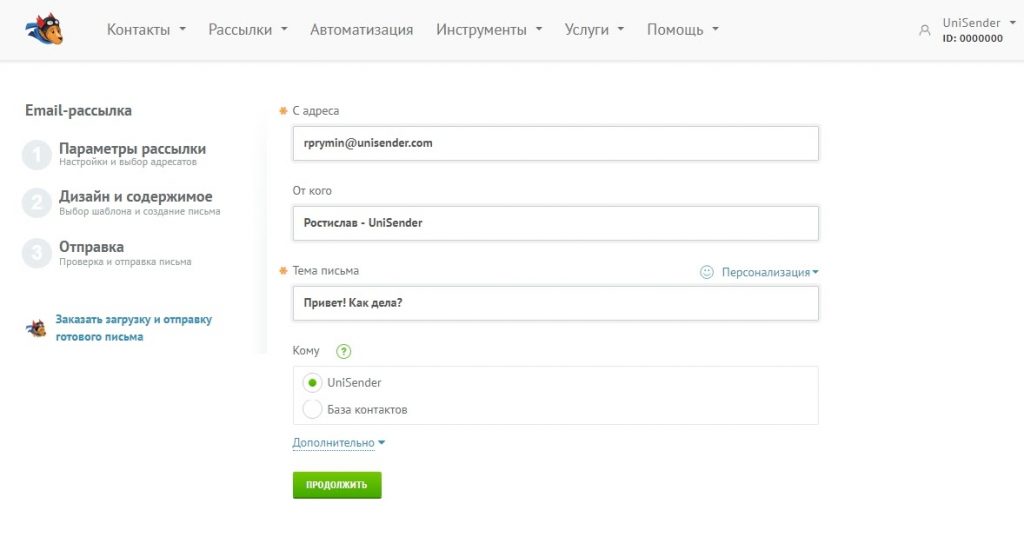
Mailing Options section
Fill in the required items:
- email address – from which we will send mailings;
- from whom – the name of the company that the subscriber will see in the “Inbox”;
- letter subject;
- the list to which we will send the newsletter.
Click the “Continue” button.
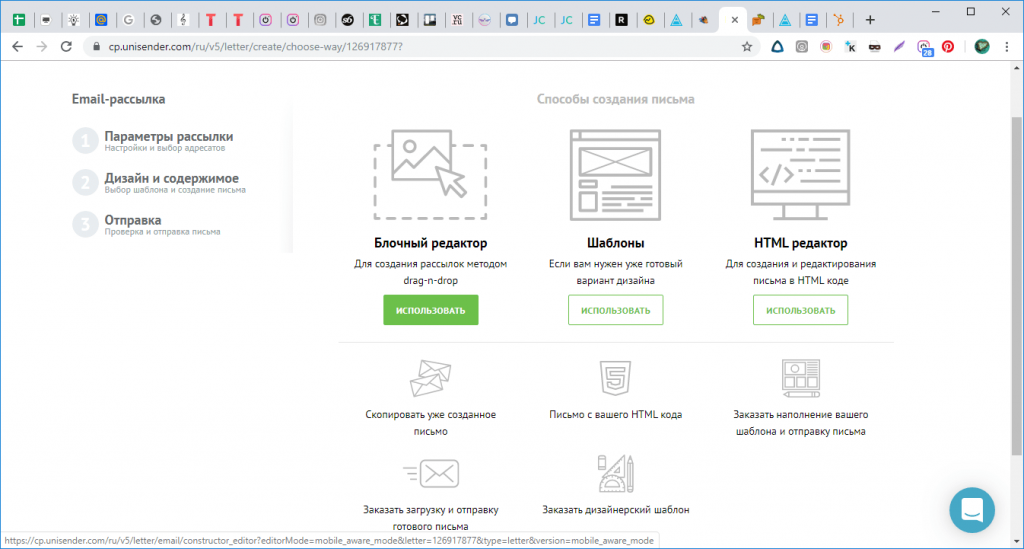
Design and content
In the section, choose the way to create a newsletter: block editor, templates, or HTML editor.
- In the block editor, you will compose a letter yourself using building blocks.
- In “Templates” you will choose from ready-made design options.
- In the HTML editor, you can create your template manually or insert ready-made code.
Let’s take Block Editor as an example.
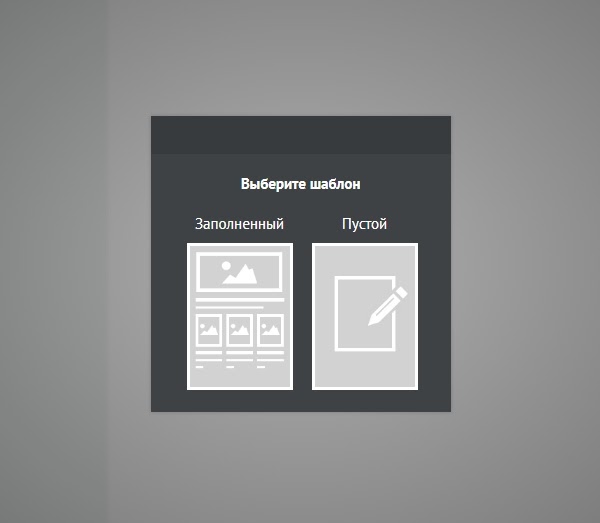
In the block editor, you can select a filled or empty template.
Let’s fill the letter with containers and blocks. Drag the required block from the menu on the left with the mouse.
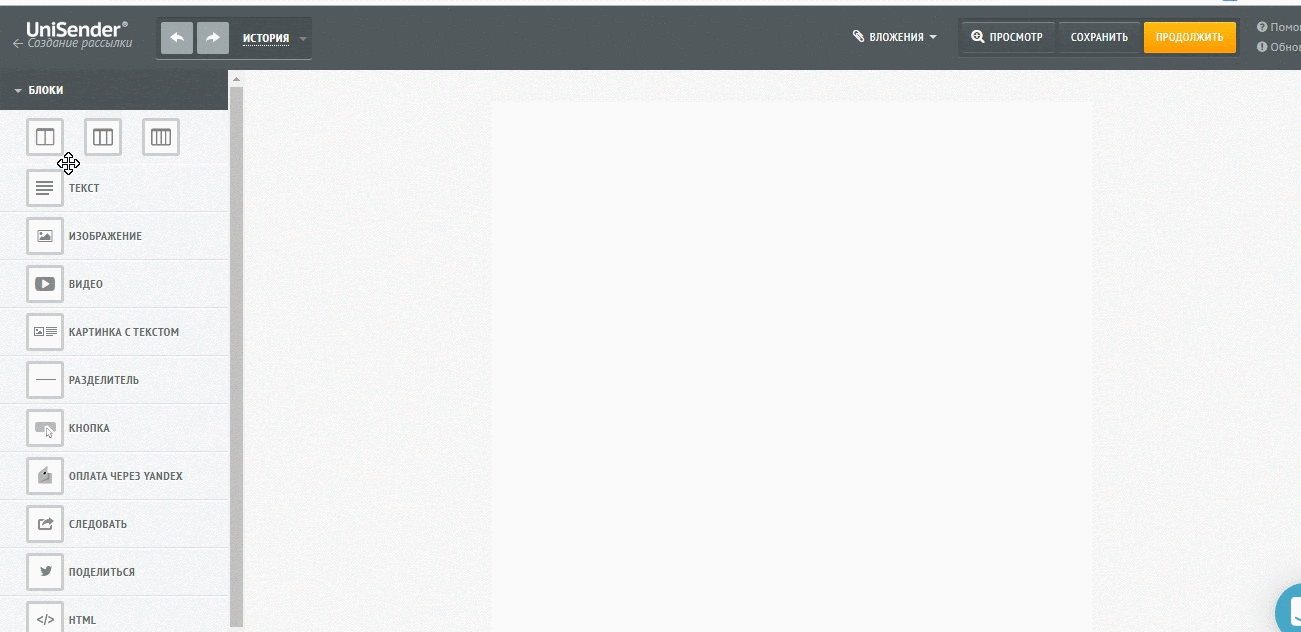
If you click on the block, a menu will appear at the top. In this menu, you can switch the style, change the content or appearance of the block, and duplicate or delete the block.
I tell you in detail how to work with each block.
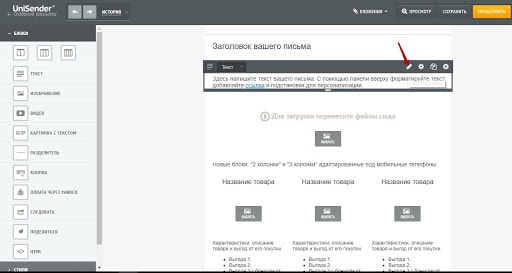
Text block
To edit a text block, click on it. A menu will appear at the top of the block:
- Click on the pencil (edit) – edit the text in the block.
- Click on the gear (settings) – change the font, background, color, indents.
Image
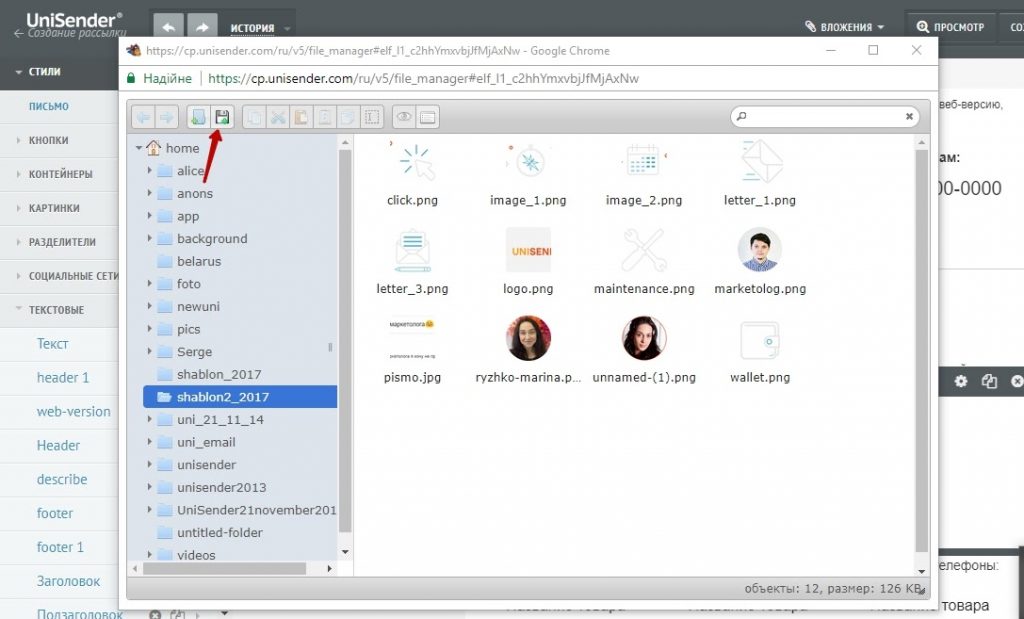
To add an image:
- Click twice on the block.
- Select an image in the file manager.
- Add an image to the block.
To edit the image, click on the gear (settings). Settings has 2 tabs:
- Style. Customize the image style: padding, alignment, borders, colors.
- Options. We add a link to the image from our site, write the alt-text of the image in case it is not displayed in the mailer. And we add a link by which a person will go from the picture.

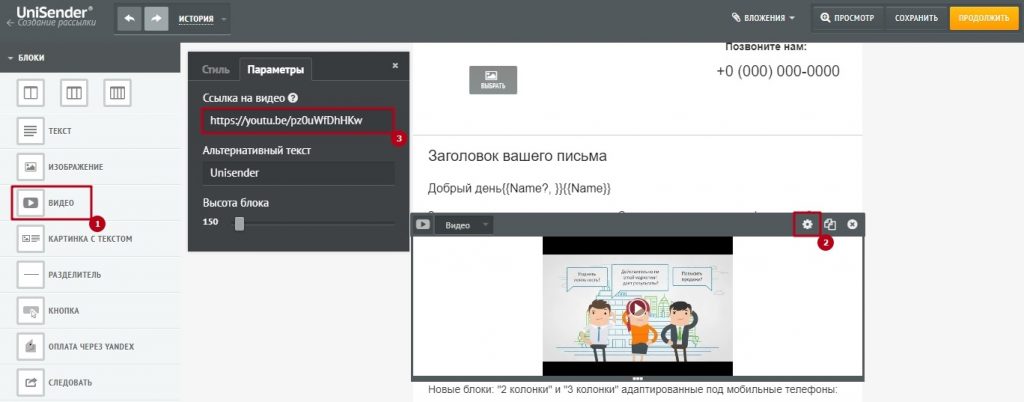
Video
You won’t be able to add a full-fledged video to an email — email applications will simply block it. Therefore, the video block is a screenshot with a player icon overlaid.
To add your video, click on the gear, select the “Options” tab, add a link to the file and alt text.
Button
Editing the button:
- Click on the pencil (edit) – edit the text on the button.
- Click on the gear (settings) – change the color of the button, rounding, height, width, size and color of the text.
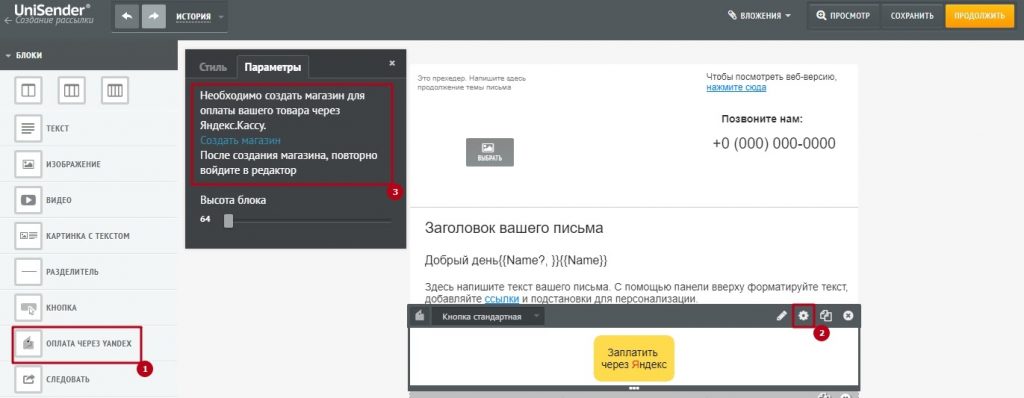
Payment via Yandex
For this block to work, you must have a store created to pay for the goods.
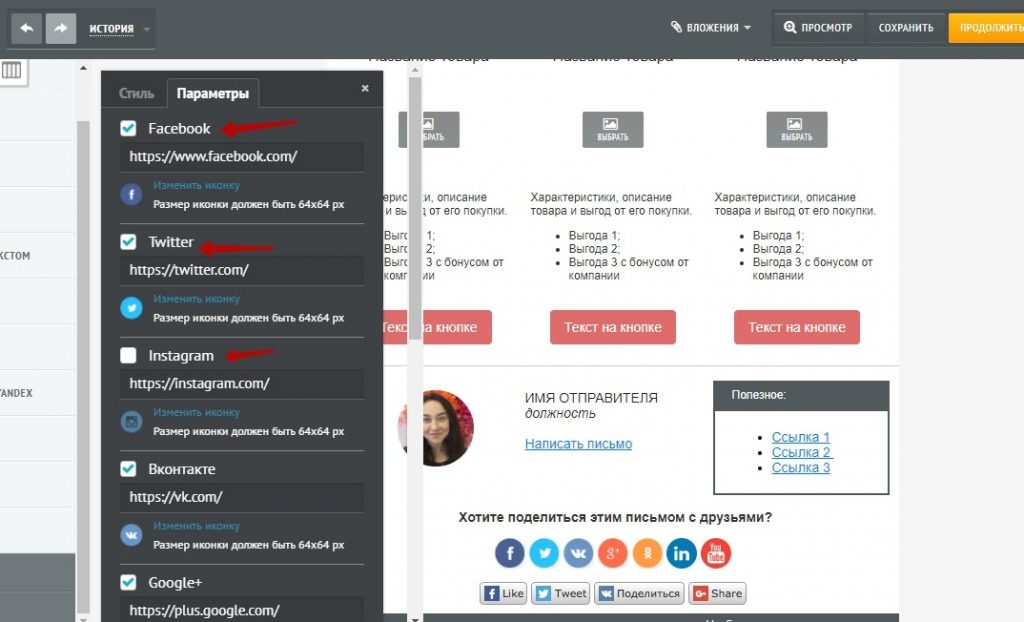
The “Share” block allows you to repost part of the letter or the entire letter on the social network.
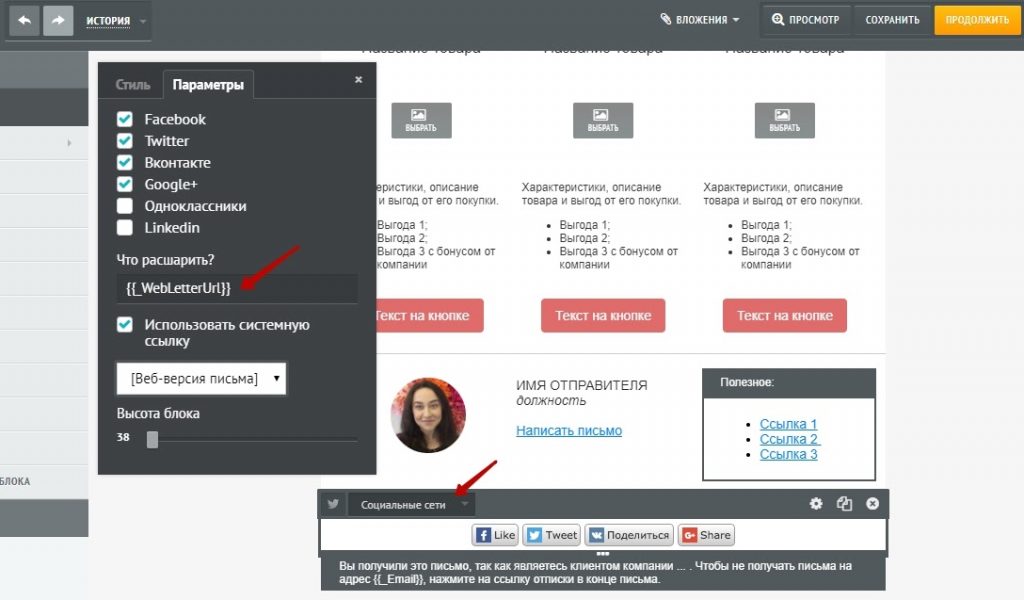
The Follow block adds links to pages on social networks.
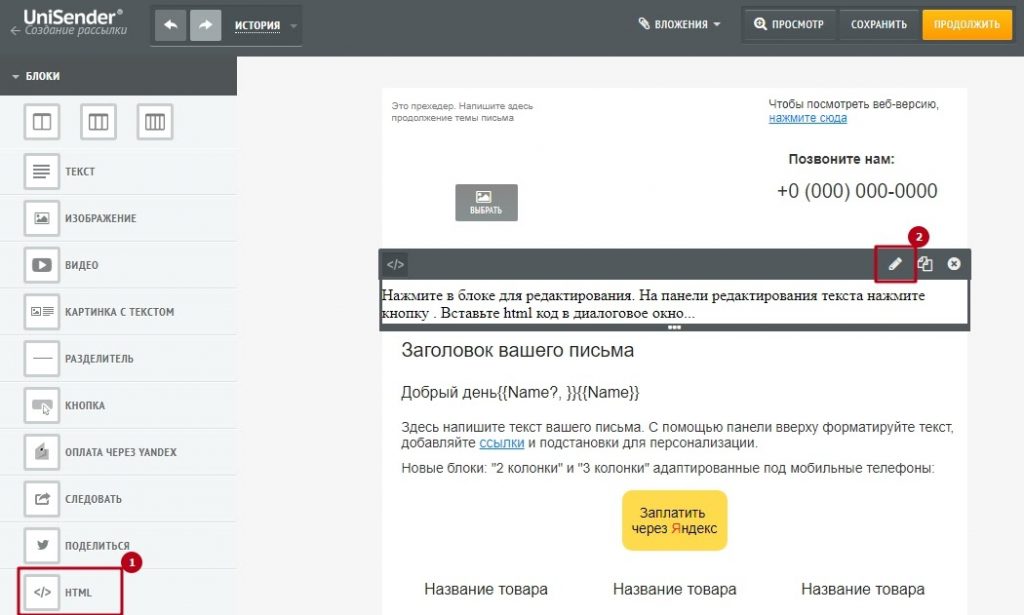
HTML
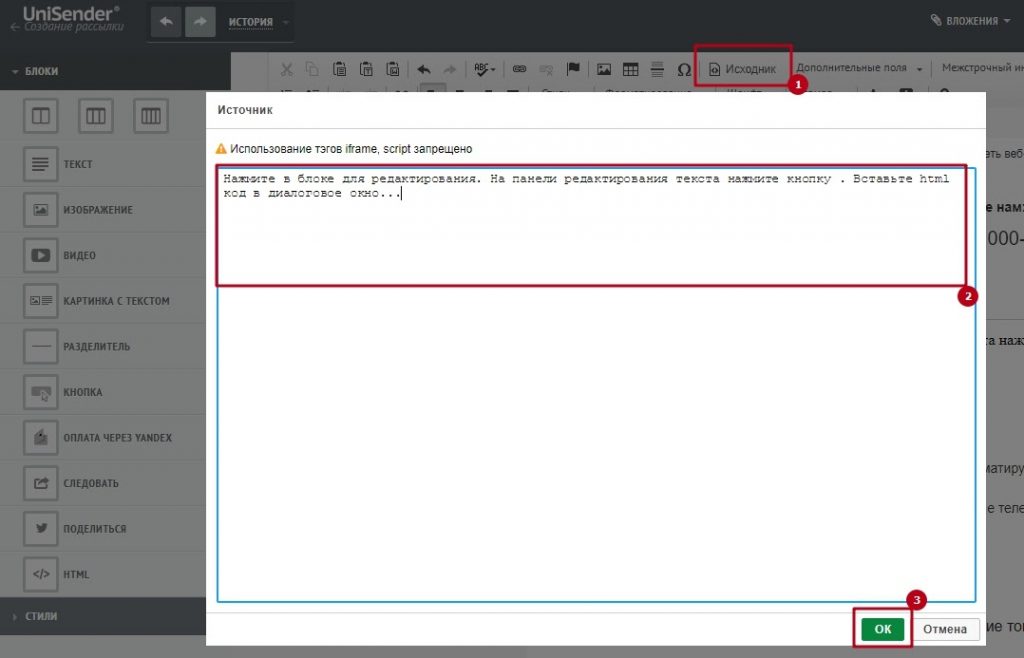
You can add a block laid out outside the editor via the HTML block. To add html code to an email:
- Click on the pencil (edit).
- Select “Source”.
- We add code.
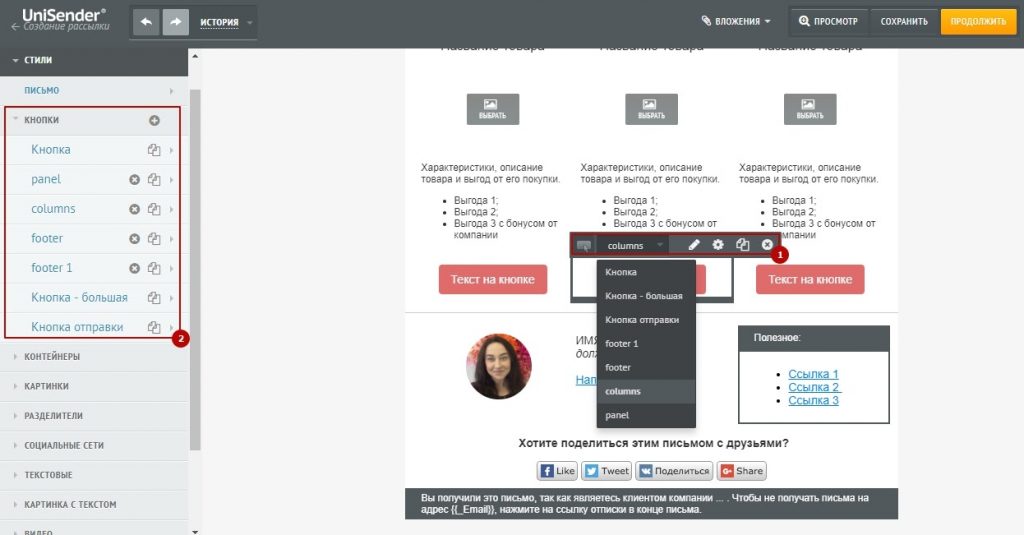
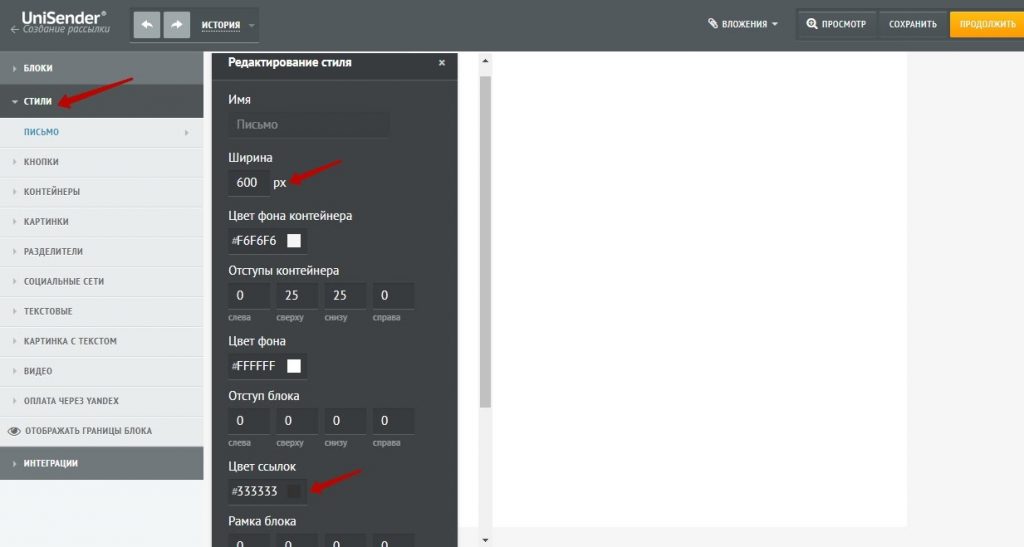
Section “Styles”
Just below the “Blocks” section of the sidebar is a “Styles” drop-down section. Styles make your life easier.
For example, you created an email with links to 6 products (2 rows of 3 products). Each product has an image, text and a button. If you decide to change the color of buttons or text, then you do not need to do this 6 times. It is enough to change the style of text or buttons – all blocks in this style will change with it.
Writing style section. Customize the overall writing style. You can, for example, change the width of the letter, indents, alignment or color of links.
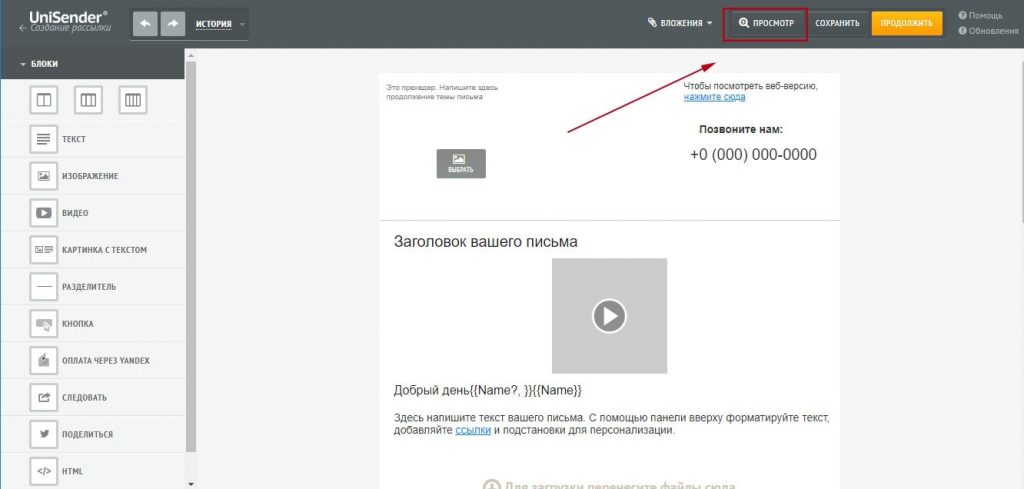
Preview
Before sending, check how the letter will look in the mailbox on different devices. Click the View button.
In the form that opens, you can see how the letter looks on the desktop and on the smartphone, as well as in the text version without pictures. You can always go back to editing and tweak the layout. From the same window, you can send a test email.
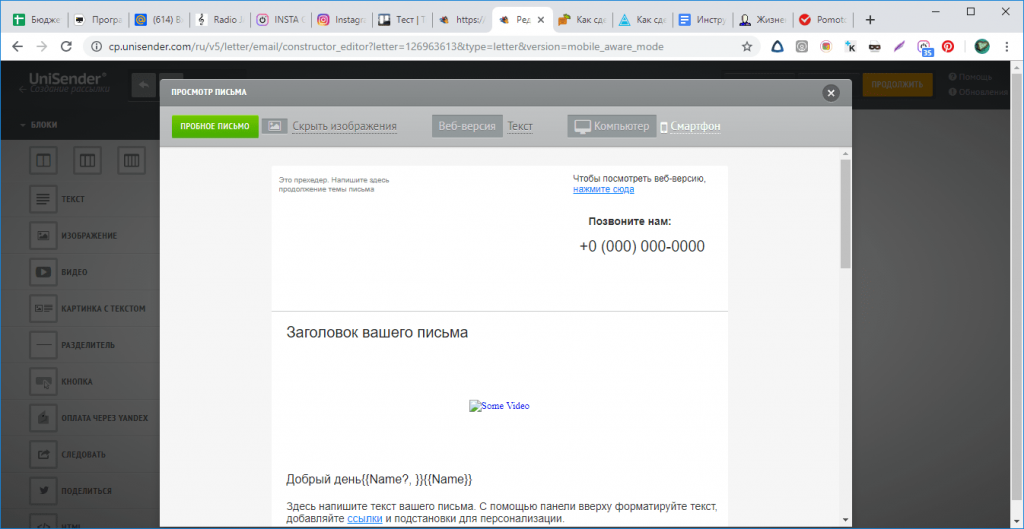
If everything is fine, send yourself a test letter (the button in the upper left corner). This way you will find out if the letter passes spam filters and how it looks in the mail service. Click on all links, check the appearance of the letter.
If everything is fine – run!
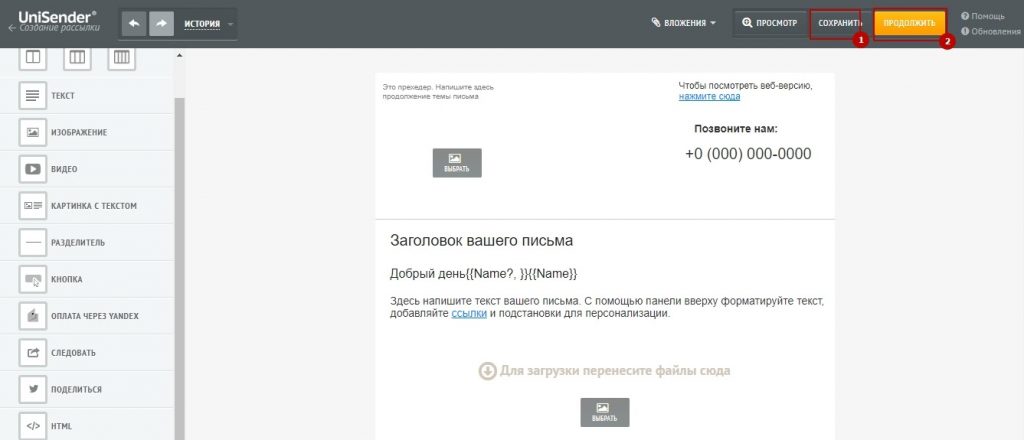
Step 4. Submit
When the template is ready, click “Save” and “Continue”.
Please note that the maximum email size is 8 MB.
On the launch page, you can send an email right now or set up delayed sending for a specific day and time.
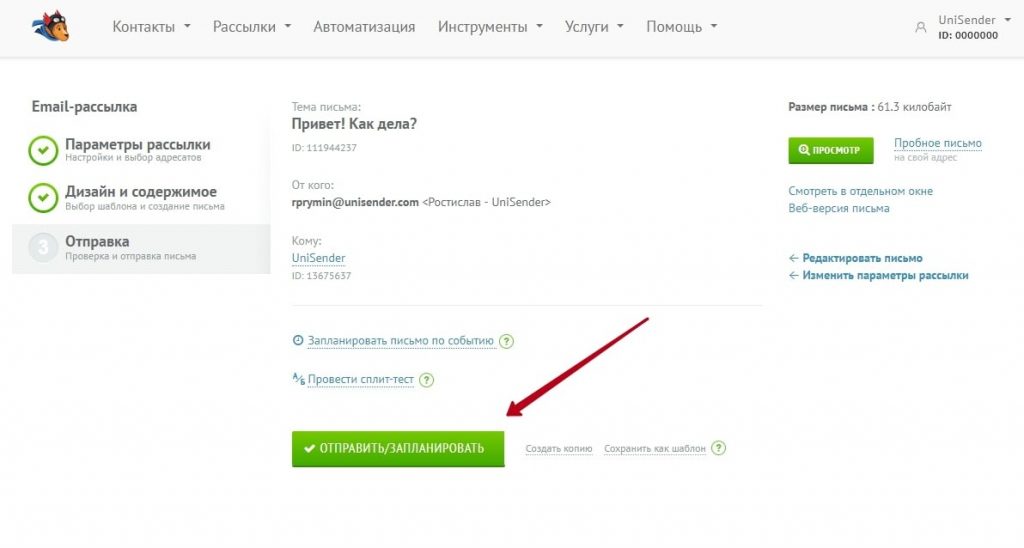
In the same window, we can configure the transfer of statistics to Google Analytics. Click on the checkbox “Integration with Google Analytics/Yandex.Metrika” and click “Configure”.
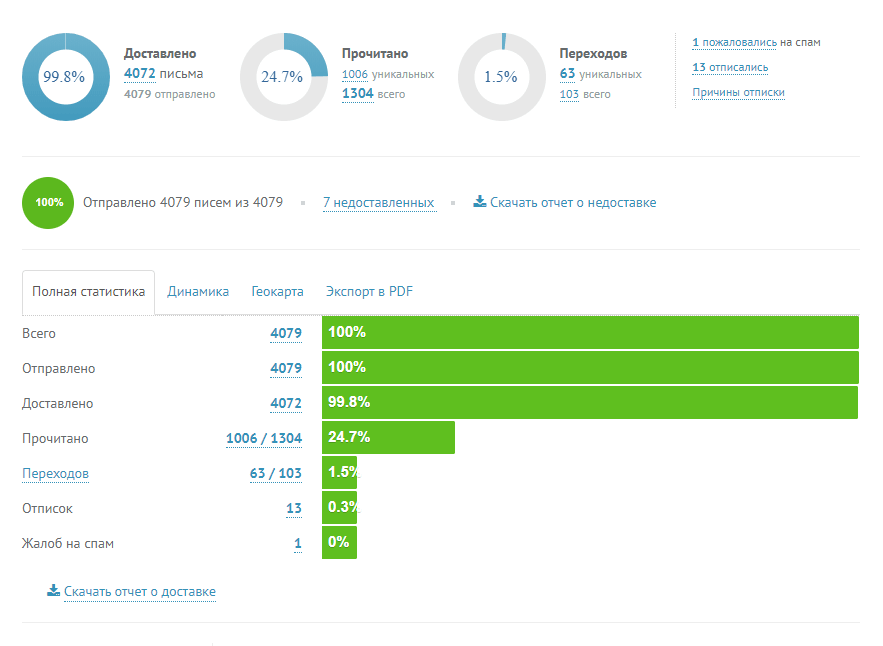
Be sure to analyze the results of the mailing in the “Mailings” – “Sent Reports” section. There you will find statistics of delivered, opened emails and the number of clicks.
In UniSender, all the functions of the service are available on a free plan, only the size of the contact database is limited.
Internet marketing expert. Head of marketing agency MAVR.
Business degree “Master of Business Administration” (MBA).