
Online XML feed generator Textus (closed)
Do you advertise a large number of products using contextual advertising? Do you want to save yourself from the routine work of collecting and updating data for advertised goods or services? Then you need a new service from the Garpun team – a simple generator of updatable Textus XML feeds. In this review, I will try to tell you in detail about the possibilities of this service.
Let’s start with the fact that a data feed is necessary for any contextual advertising automation system or price aggregators. And if earlier you needed the help of a webmaster to obtain such data, now there is no need for this. You can use the free Textus service. It will allow you to quickly create an updated XML feed with data for a client’s advertising campaign or your own online store. This does not require special knowledge. It is enough to have a basic understanding of HTML and CSS.
Who can benefit from Textus:
- contextual advertising specialists;
- advertisers;
- web developers.
But is Textus really as good as they say? Let’s check everything in practice.
Working with the Textus XML File Generator
Follow the link xml.garpun.com and register. At the moment, the service is at the stage of open testing and is therefore available for free.
After a very easy registration, you should have the following window:

This is where we will create our projects. But first, let’s set up the parser, i.e. Let’s set the rules by which the service will collect the information we need.
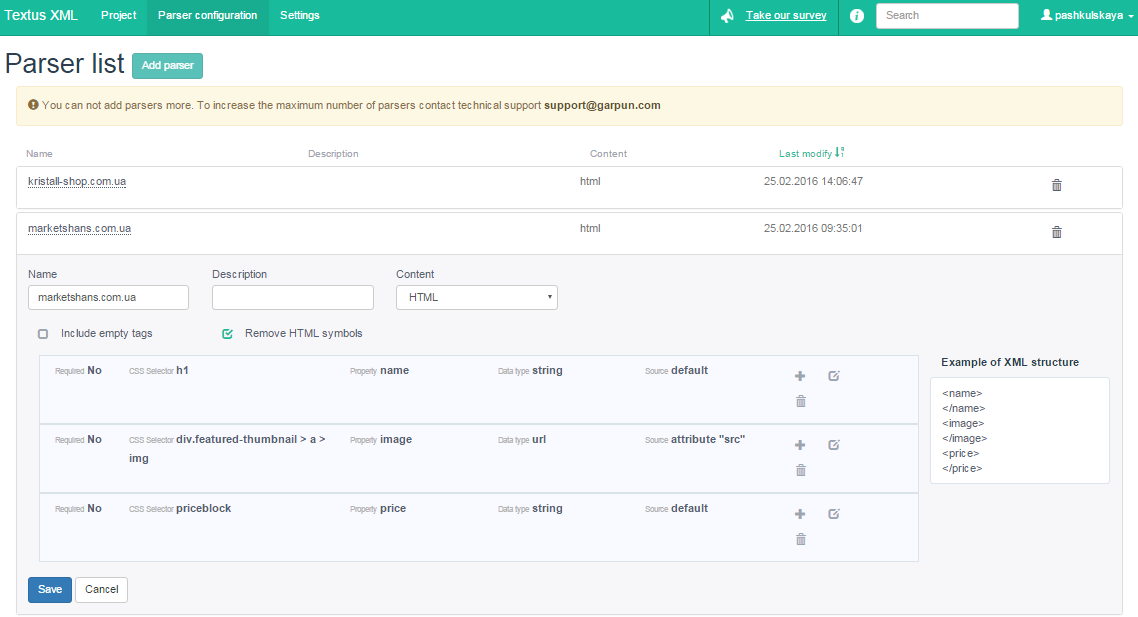
Go to the “Parser configuration” tab and add a new parser. As an example, I took an online furniture store. The name and description of the parser are not that important, but should be clear to you first. In the parser, the most important thing is to set up the CSS Selector.
 We set the rules for the data we want to receive. The first is, of course, the name of the product. We go to the site, open the card of any product and right-click on the name. Select “View Code” from the drop down menu.

We see that the product name is contained in the h1 tag. Which is basically logical. Then we go back to the parser settings and fill in the first rule:
- In the CSS Selector field, write the h1 tag, because it contains the name of the product;
- In Property we write “name”;
- Data type select “string”;
- Source – “default”.
The third paragraph means that you need to specify the type of data that you will collect. There are 3 options to choose from:
- string – text string;
- url – link;
- number – number.
In this case, the product name is, of course, “string”.
In the fourth paragraph, we choose from which source to collect information: text or attribute, or leave the default default. Which is what I did, in fact. I will talk about the attribute source a little later.
After all the fields are filled, be sure to click “Save“.
The rest of the rules will be formed in a similar way. For example, we also want to get a link to an image and the price of a product. This is where defining the CSS Selector gets a bit tricky.
If you do not have at least basic knowledge of CSS, then it will not be difficult to figure it out. But what about people who do not even know what CSS is and what it is eaten with?
There are 2 exits:
- you can install BugBuster – a browser extension that will help you define CSS Selectors with one click;
- or use the browser’s built-in functionality to copy the CSS Selector of any required element.
With the first, everything is quite simple. Just install the extension. Activate it on the page of the product you want to get data from by clicking “Pick CSS Selector”. It will automatically start highlighting all the elements on the page. Choose the one you need, click and BugBuster automatically saves the CSS Selector to the clipboard. All you have to do is paste it into the required field.
Let’s define a CSS Selector for the image using the second method. To do this, right-click on the image. We also select “View Code” from the menu. The browser highlights the selected elements, so just right-click in the code window and choose Copy→Copy selector. It is also saved in the buffer and all that remains is to paste it into the “CSS Selector” field.
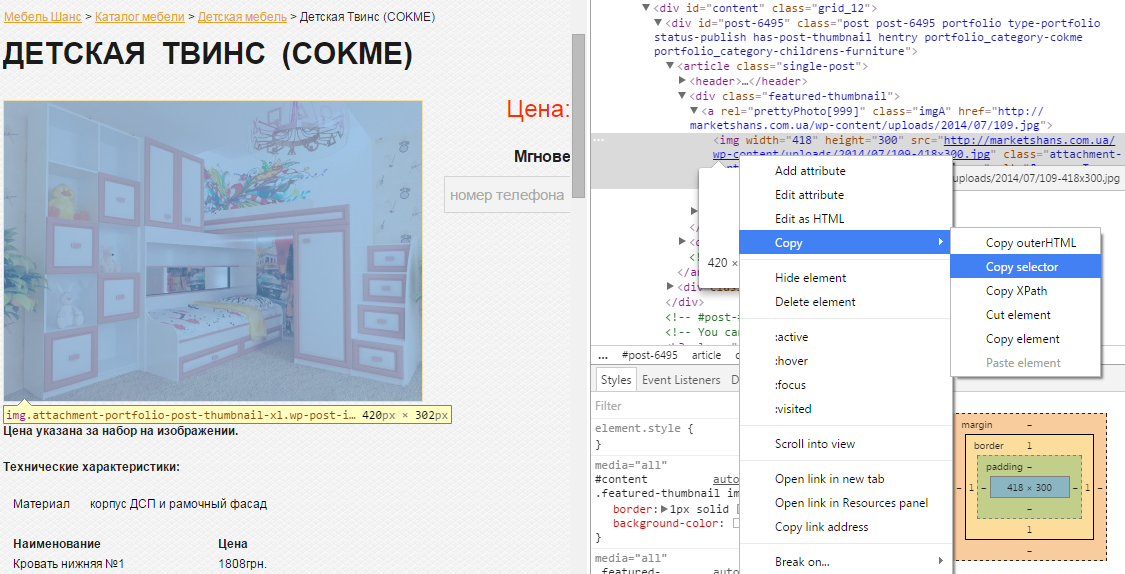
We select the data type “url“, because we want to get exactly the link to the image. And here you need to be careful. As you can see, our link is in the “a” tag of the “div” class. And since we need exactly the link, we will specify the “src” attribute as the source.
It seems nothing complicated. Further, in any way convenient for you, define all the other necessary rules, save them and we will check the work of our parser.
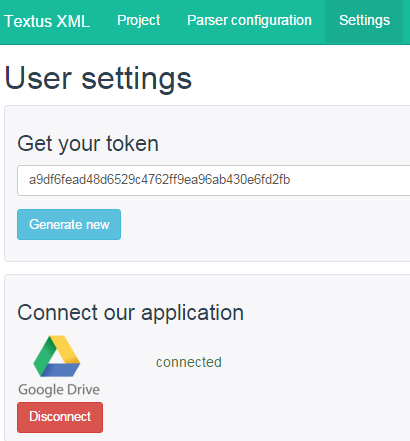
But first, we need to get a link where the results of the parser will be available. To do this, go to the “Settings” tab and generate a marker by clicking on the “Generate new” button.
Now let’s go back to the “Project” tab and create our project.
Fill in the “Project name” field, then in the “Parser configuration” select the parser we created and click the “Add” button. The project editing window appears.
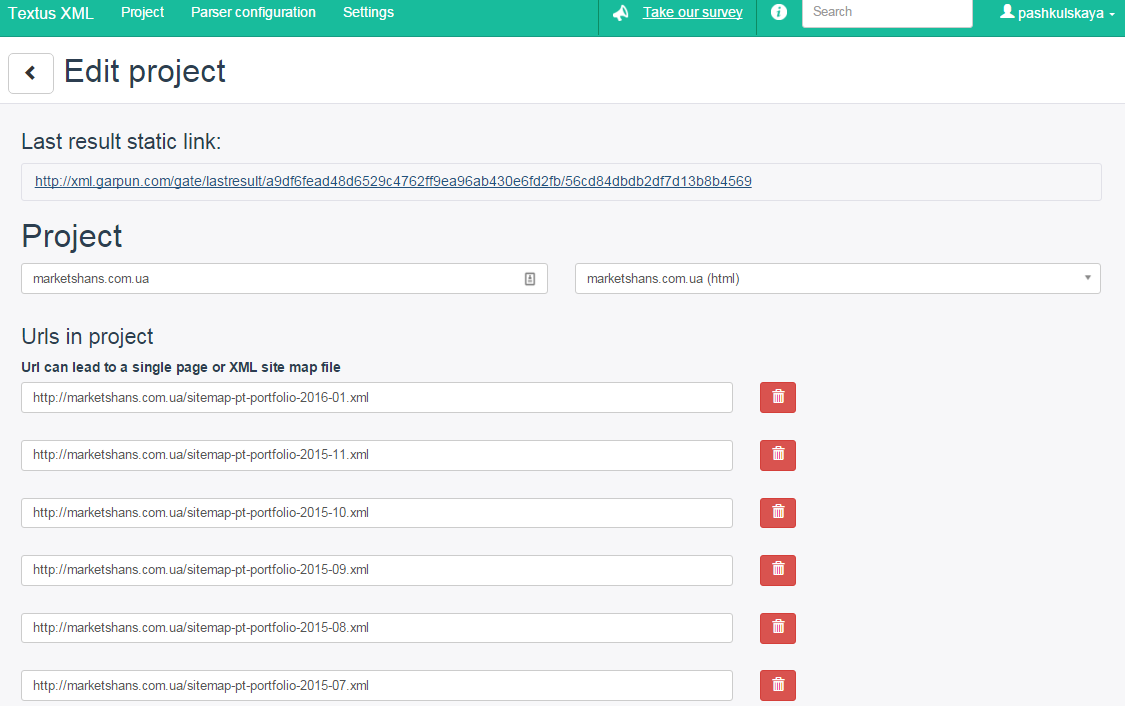
This is where the fun begins. You must specify the links from which the parser will collect information. They can be set manually. But imagine for a moment that you have an online store with a lot of products: how long does it take you to enter all the links manually? I don’t think anyone wants to do such a chore.
Therefore, Textus has the option to use an XML sitemap. Indeed, for the most part, every more or less normal site, and even more so an online store, already has an XML map. Well, if not, then generating it, in principle, is not difficult.
In my example, I just used the sitemap. In the “Urls in project” field, specify a link to the XML map. But since it contains all the links of the site, and we only need products, we need to filter them out. To do this, in the “Url’s mask” field, select “ON” and set the rule.
How to do it? You open your XML sitemap and determine how you can filter product pages. For an online store, this will be easy. Having studied the map, I realized that any product in its address contains the phrase “catalog-view”. Therefore, we will use it for the filter.
I got the following rule: *catalog-view/*
* is any sequence of characters
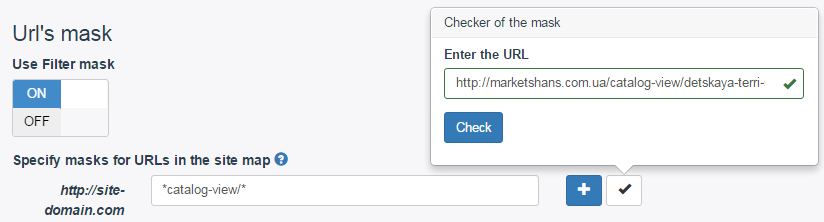
You can immediately check whether the rule works correctly. Click on the “Check the mask” checkbox, enter a link to any of the products and click the “Check” button. If everything works correctly, then a green highlight will appear as in the screenshot.
Using the rules, you can not only get a list of all products, but also break the project into certain sections. In the case of an online store, this can be, for example, different categories of goods.
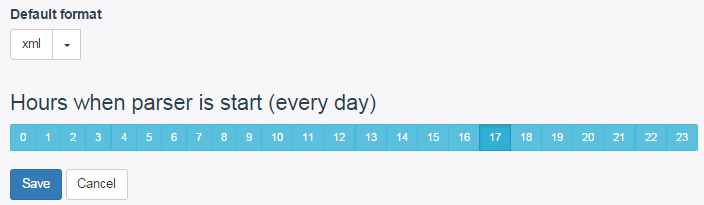
Now we need to select the file format in which we want to upload the information: xml or csv. To work with contextual advertising or price aggregators, the xml format is most often used. Therefore, we will choose it. Textus also has the ability to set up uploads to your Google drive.
Then it remains only to set the time of the daily launch of the parser. Thus, the parser will automatically run every day at the set time. And if there have been any changes on the site, for example, products have been added, then this will be taken into account in the new version.
But before saving all the settings, I should warn you. You will not be able to run the parser for verification immediately after setting it up. You need to set the closest time and wait for the parser to work or not. After all, we cannot be 100% sure that everything is set up correctly. And there is no way to force the parser to run. Only at the specified time (in Moscow). So here’s the first drawback.
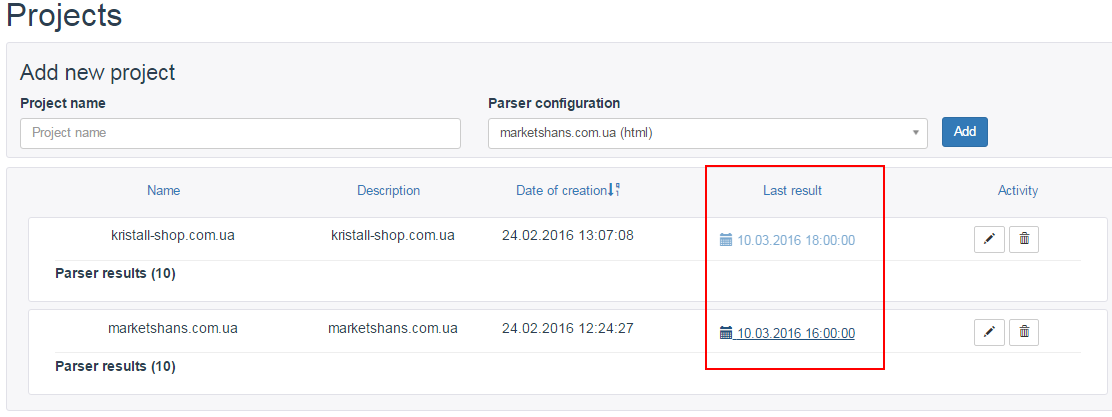
Once we have everything set up, we save and wait for the parser to work. The “Last result” field always contains the most recent file.
 Well, let’s look at the result.
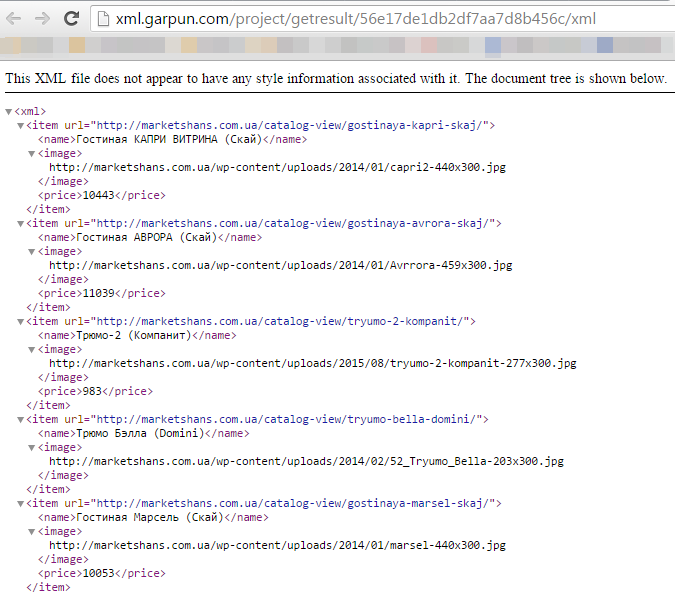
As you can see, everything works correctly. The parser has unloaded all the necessary data.
I note that in the process of studying the operation of the service, I found a few more shortcomings:
- Upload formats are not suitable for all services.
- Inconvenient display of data in xls format (test for yourself and see for yourself).
On the first point, I can say that services that work with contextual advertising sometimes require data in yml format. So, in that case, Textus won’t help you. At least for now. After all, the service was developed mainly for the Garpun system, and the xml format is very suitable for it. But Textus is still in the testing phase. Let’s hope that the Garpun team will finalize it. After all, they have every chance to end up with a fairly good service. So, I wish you good luck!
In addition to everything described above, I suggest watching a detailed video on setting up Textus.
Руководитель SEO-отдела маркетингового агентства MAVR. 4 года опыта в SEO.
Имеет опыт в сферах: beauty, спорт, рекламные услуги и т.д.
Количество проектов: более 94